In this tutorial we’ll launch a tech blog using Hugo and Amplify Console.
Domain Name Preparations
First we need to register a domain name, or create a Hosted Zone in Route 53. Registering a domain name with AWS, automatically creates a Hosted Zone that you can use. If you registered a domain name with another registrar, you can create a Hosted Zone in Route 53 and use the Nameserver configuration.
If it’s a subdomain (blog.yourdomain.com) you can just add a NS record “blog.yourdomain.com” to “yourdomain.com” pointing to the NS records of the Hosted Zone. If you want to host an so called zone apex (yourdomain.com), you have to change the NS records of the complete apex. Be aware, all current DNS-records must be transferred manually to the Route 53 Hosted Zone!
CodeCommit Preparations
It’s recommended to use GitLab or GitHub for your repositories and that works easier compared to CodeCommit. In particular if you want to work together with others on the same website. You can use CodeCommit, and that’s what I’m going to use in this tutorial. With CodeCommit, you have to take the following steps:
- Create an IAM user with sufficient permissions
- Create or upload the public SSH key
- Add the user/identity file to
~/.ssh/config (below)
- Create a respository and clone it on your computer
1
2
3
|
Host git-codecommit.*.amazonaws.com
  User APKAEIBAERJR2EXAMPLE
  IdentityFile ~/.ssh/codecommit_rsa
|
Find a detailed description of these steps here.
Hugo
I cloned the repository to a folder called “demo”. I’ll open a terminal and use the following commands to setup a basic Hugo Blog. Make sure you are one directory level higher. Otherwise it will create a folder “demo” with all objects in it, and you have to move them one level up.
$ brew install hugo
$ hugo new site demo --force
$ cd demo
$ git submodule add https://github.com/budparr/gohugo-theme-ananke.git themes/ananke
$ echo 'theme = "ananke"' >> config.toml
$ hugo new posts/post1.md
Instead of using a free theme like Ananke in this example, I often create my own themes. With the following command, you can run hugo locally to test. If you add -D it will also include the drafts.
Amplify.yml
The default Hugo version of Amplify Console is often a bit old. With the following amplify.yml in the root of your repository, you can use a specific version. If you update on your machine, just update the environment variable in this script to avoid surprises in the future.
Notice the “extended” version, this version includes a few additional components for compiling CSS, which a lot of themes require.
 1
 2
 3
 4
 5
 6
 7
 8
 9
10
11
12
13
14
15
16
17
18
19
20
21
|
version: 0.1
env:
  variables:
    HUGO_VERSION: "0.73.0"
frontend:
  phases:
    build:
      commands:
        - wget --quiet https://github.com/gohugoio/hugo/releases/download/v${HUGO_VERSION}/hugo_extended_${HUGO_VERSION}_Linux-64bit.tar.gz
        - tar -xf hugo_extended_${HUGO_VERSION}_Linux-64bit.tar.gz hugo
        - mv hugo /usr/bin/hugo
        - rm -rf hugo_extended_${HUGO_VERSION}_Linux-64bit.tar.gz
        - which hugo
        - hugo version
        - hugo -b "/"
  artifacts:
    baseDirectory: /public/
    files:
      - '**/*'
  cache:
    paths: []
|
Now commit and push all changes to your repository. Your repository now has a master branch with all contents.
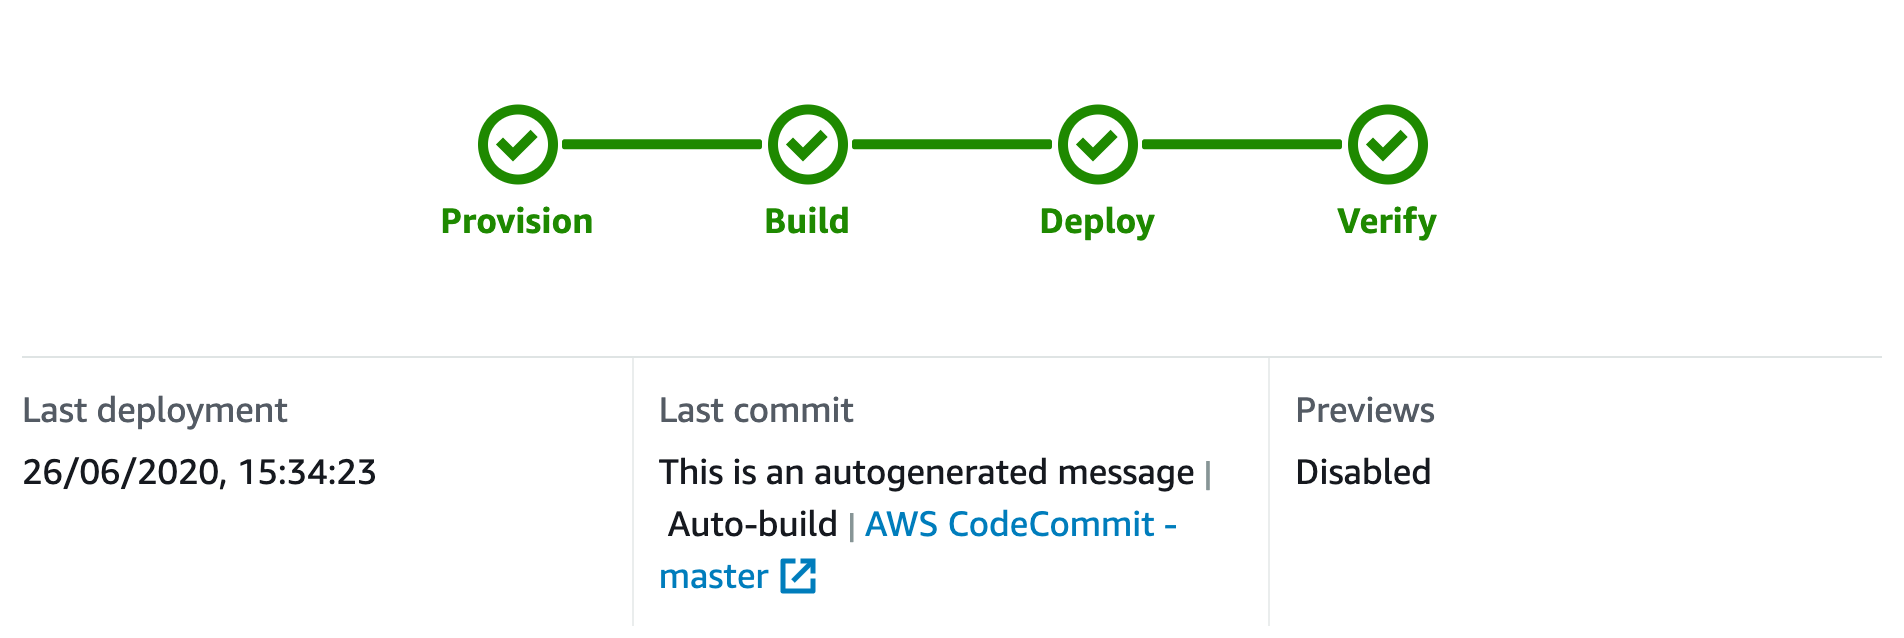
Amplify Console
Now head over to the Management Console and find the service “Amplify Console”. Create a new website by clicking the Connect App button, and point to the Git repository you are using. It will take a few minutes to create your website. This website is using an amplify domain name.
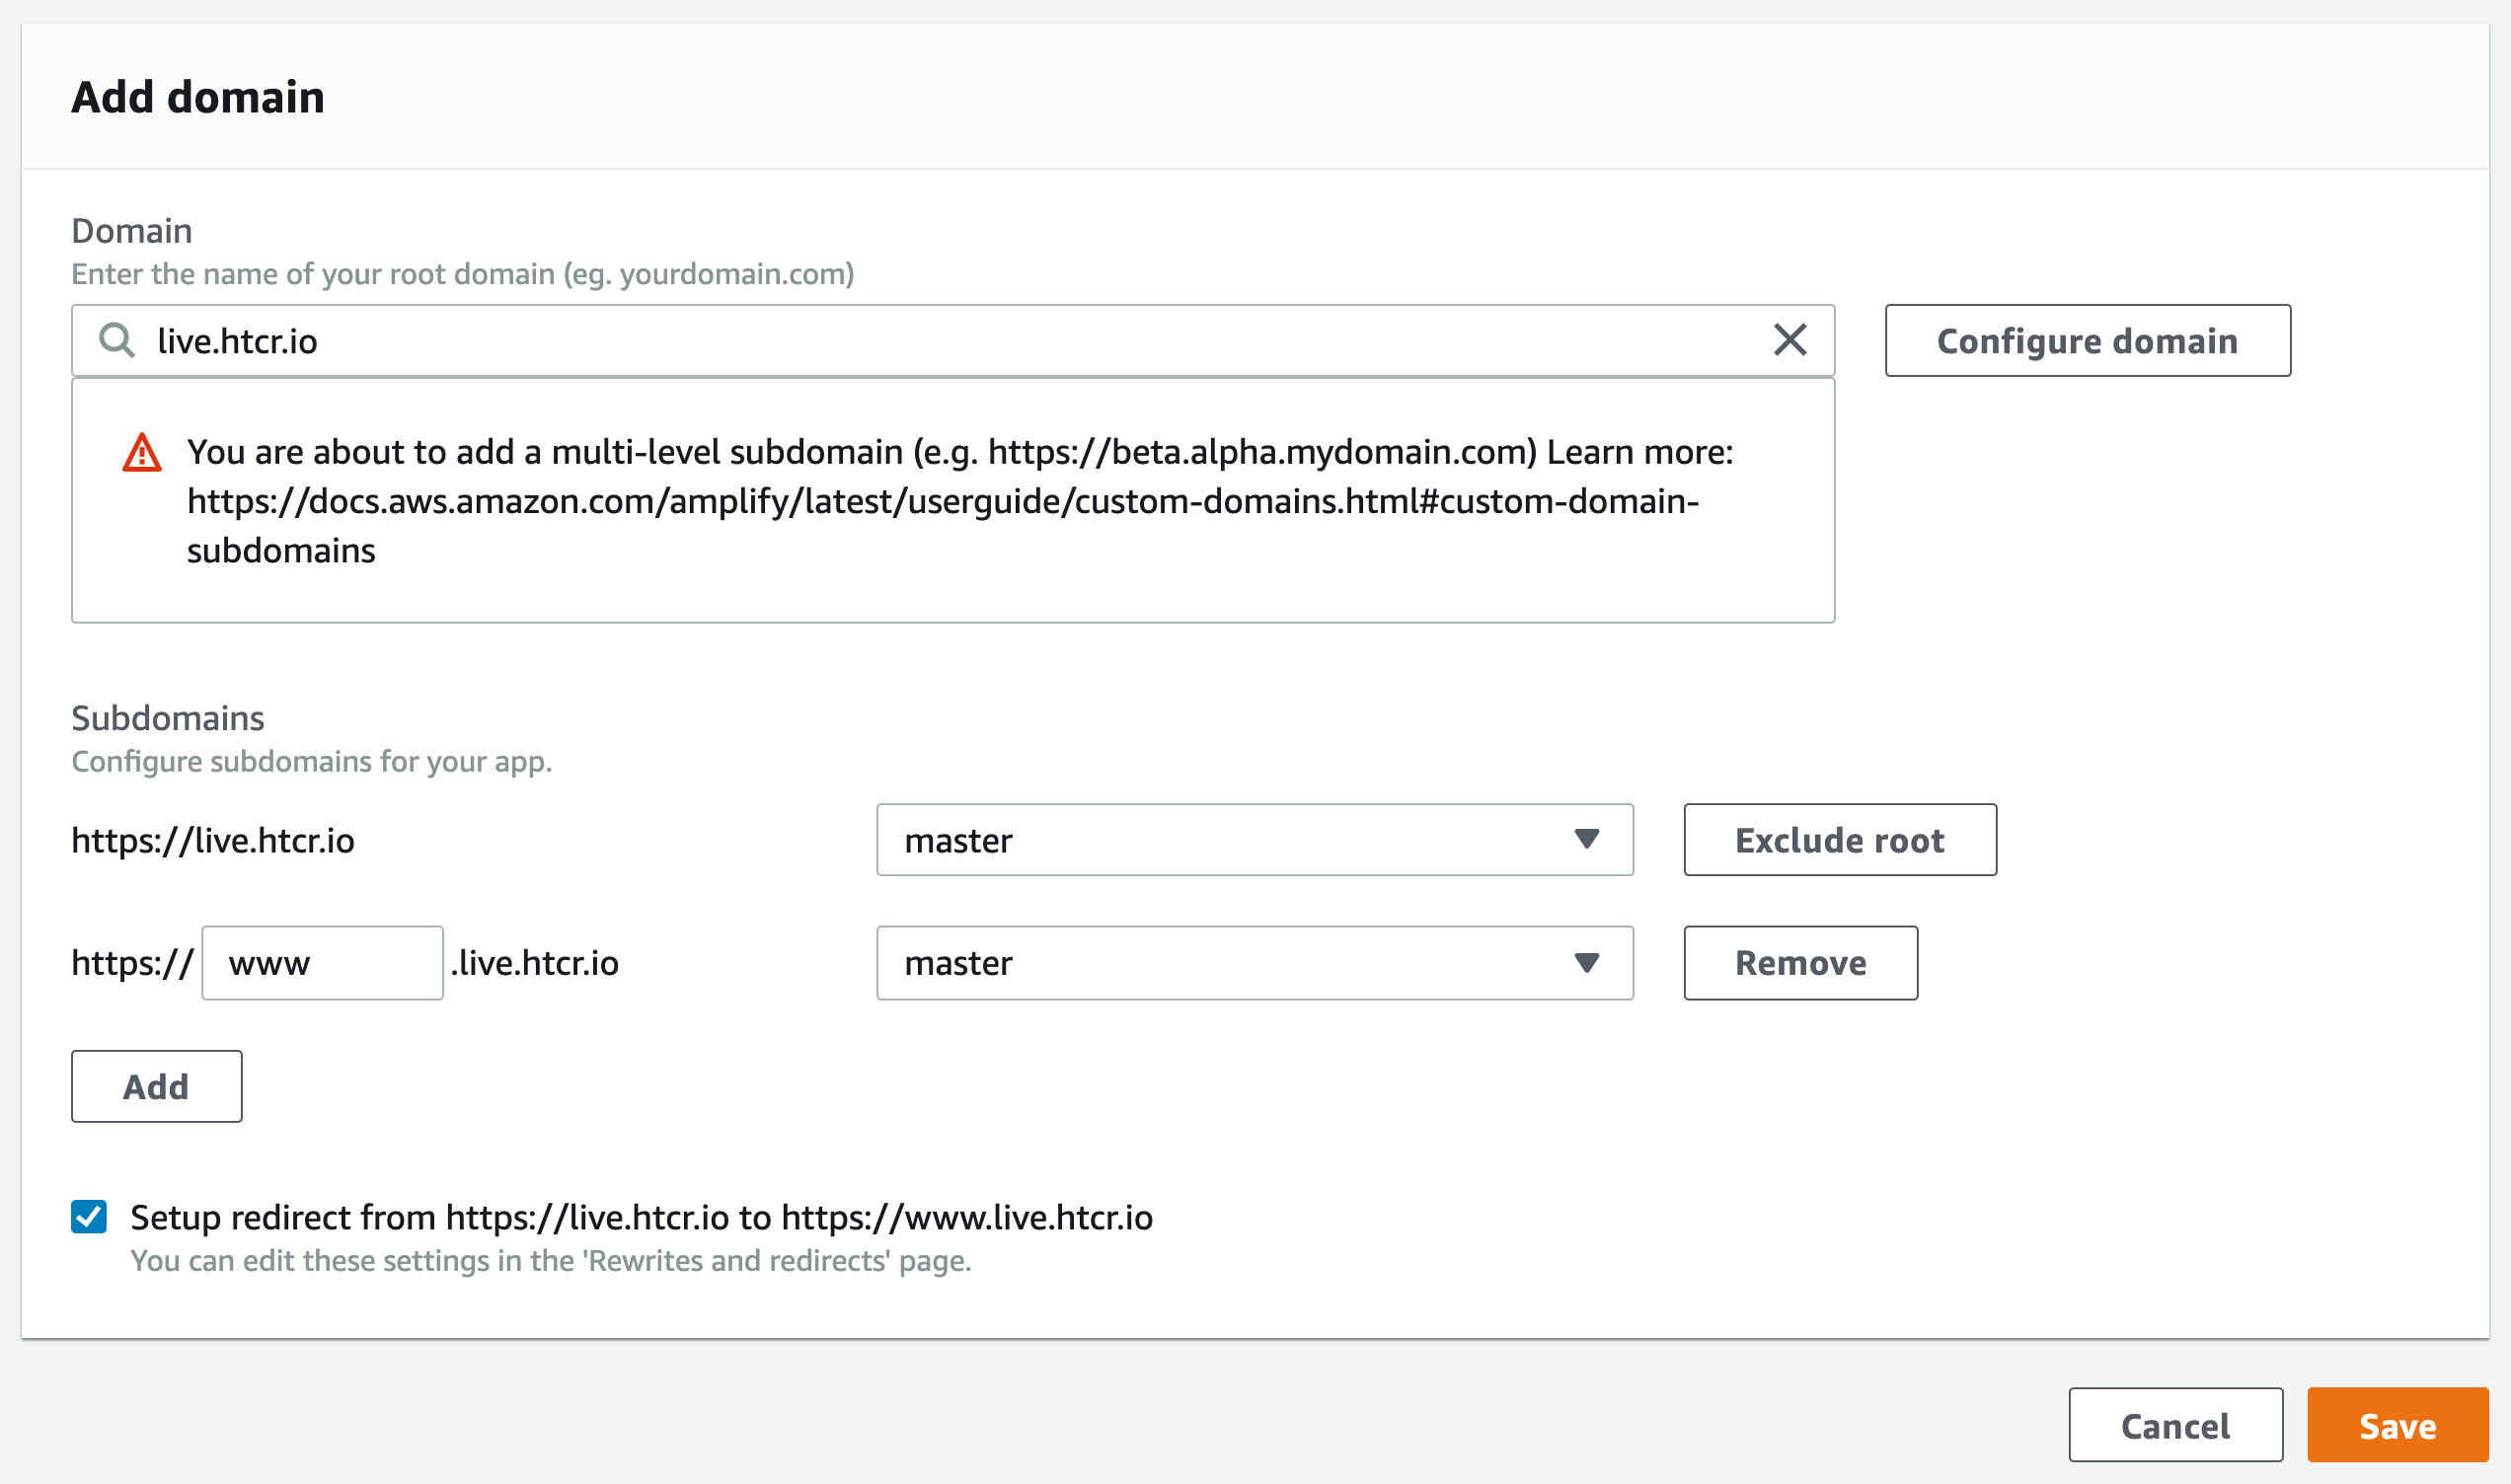
Change Domain
Now head over to the add domain management, Add domain, and select the domain name you would like to have and click configure. Keep the checkbox with the redirect checked. The default is Amplify Console redirects from yourdomain.com to www.yourdomain.com, and I prefer just the opposite. So: www.yourdomain.com to yourdomain.com. Once you finished the domain name change, it will take up to 30 minutes to create the domain name, the SSL certificate, and deploy everything.
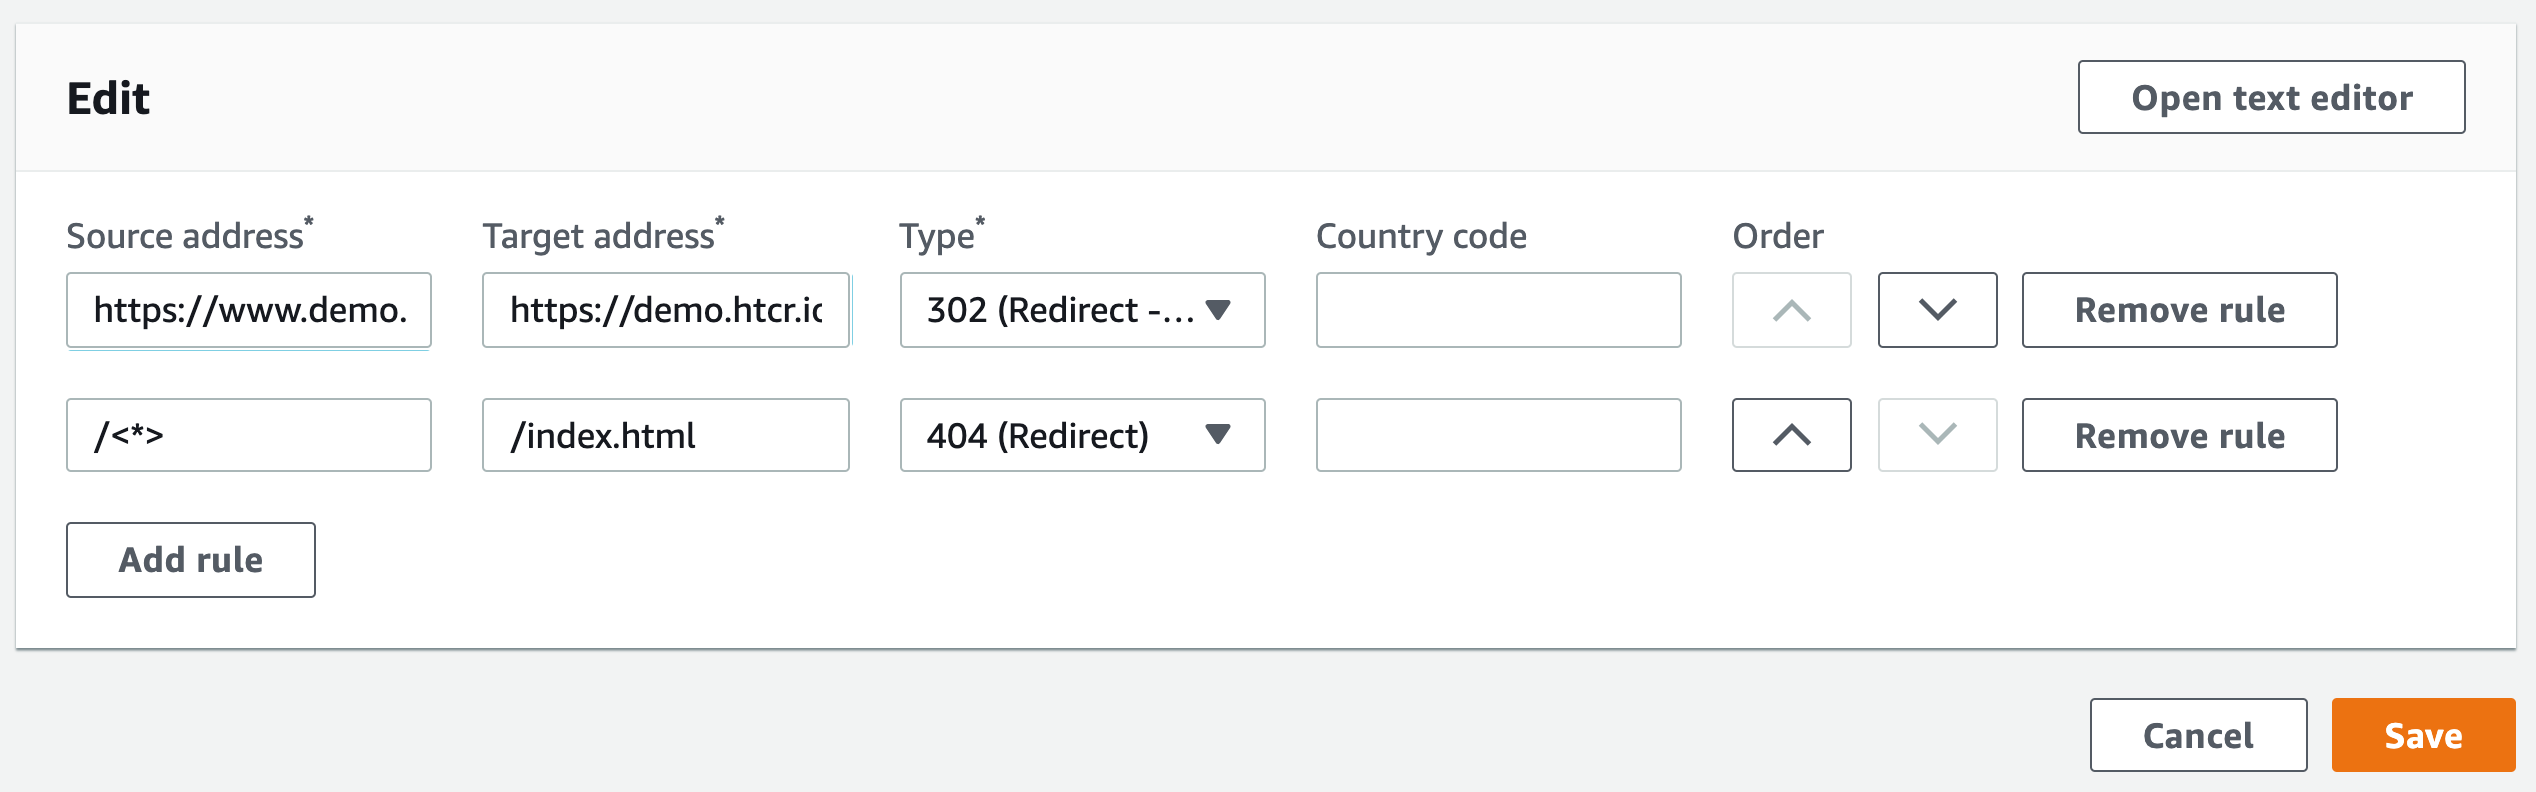
Change the redirect
Now change the redirect. Instead of redirecting traffic from yourdomain.com to www.yourdomain.com, we do the opposite. Change the domain names and hit save. Now wait a few seconds and try to access the website www.yourdomain.com, it will automattically redirect to yourdomain.com
Conclusion
We looked at Hugo, some Route 53 and CodeCommit, and only a few steps in Amplify Console. But that’s all that it takes to deploy a static website.
Take a look at other blog posts on my website for more advanced tips & tricks with Hugo and Amplify Console.
-Martijn